How to block wp-login.php brute logins with cPanel, mod security, and ConfigServer Firewall

If you run a server that hosts numerous WordPress sites you know that constant brute force attempts to login to wp-login.php is a common occurrence. Now you could try and convince your clients to install plugins to handle this, but more than likely that’s not really an option. Well luckily with a little configuration of mod_security you can easily block these attempts using the free ConfigServer Firewall, and here’s how (WHM/cPanel details added on 1/19/17).
(Originally published on 10 Aug , 2014)
First you need to make sure that you compiled Apache with mod_security, if not you will need to run EasyApache again and make sure that mod_security is enabled. You will also need ConfigServer Firewall, which if you don’t already have this installed you already have a problem. To be honest, mod_security and ConfigServer Firewall should absolutely be installed on every cPanel server, if you are not using it, you may already have larger problems (unless you are using another firewall or another solution). You can check if Apache has mod_security compiled or not by running this command:
|
1 |
grep "modsecurity" /usr/local/apache/logs/error_log |
This should give you an output of something similar to this:
|
1 |
[Fri Jul 18 04:44:14 2014] [notice] ModSecurity for Apache/2.7.7 (http://www.modsecurity.org/) configured. |
So now we need to configure out custom Mod Security rule that will handle blocking excessive wp-login.php attempts. You can either manually edit the user file from command line or use the built in editor inside WHM. To use standard command line interface, just open and edit the /usr/local/apache/conf/modsec2.user.conf file. If you want to use WHM go to Plugins > Mod Security, this will show you a page where you can see the log for any blocks, etc. At the top you will see a button that says Edit Config, click that button and you will now have a page where you can edit the same file from above.
For the latest version of WHM/cPanel check their documentation for the modsec2.user.conf file:
https://documentation.cpanel.net/display/68Docs/ModSecurity+Tools
Now let’s go ahead and add our custom rules, copy and paste the following:
|
1 2 3 4 5 6 7 8 9 10 11 12 13 14 15 16 17 18 19 20 |
SecUploadDir /tmp SecTmpDir /tmp SecDataDir /tmp SecRequestBodyAccess On SecAction phase:1,nolog,pass,initcol:ip=%{REMOTE_ADDR},initcol:user=%{REMOTE_ADDR},id:5000134 <Locationmatch "/wp-login.php"> # Setup brute force detection. # React if block flag has been set. SecRule user:bf_block "@gt 0" "deny,status:401,log,id:5000135,msg:'ip address blocked for 5 minutes, more than 10 login attempts in 3 minutes.'" # Setup Tracking. On a successful login, a 302 redirect is performed, a 200 indicates login failed. SecRule RESPONSE_STATUS "^302" "phase:5,t:none,nolog,pass,setvar:ip.bf_counter=0,id:5000136" SecRule RESPONSE_STATUS "^200" "phase:5,chain,t:none,nolog,pass,setvar:ip.bf_counter=+1,deprecatevar:ip.bf_counter=1/180,id:5000137" SecRule ip:bf_counter "@gt 10" "t:none,setvar:user.bf_block=1,expirevar:user.bf_block=300,setvar:ip.bf_counter=0" </locationmatch> ErrorDocument 401 default |
At the top you will see where i’m setting the SecUploadDir, SecTmpDir, and SecDataDir to /tmp, this is because on the cPanel servers I set this up on I kept getting errors like you can see below. Normally this would already be defined but it seems like with cPanel servers it is not. Hence, the reason we add those lines at the top of the configuration to define /tmp as the directory to use.
|
1 2 3 |
[Sun Aug 10 13:37:11 2014] [error] [client 1.2.3.4] ModSecurity: collection_retrieve_ex: Unable to retrieve collection (name "user", key "1.2.3.4"). Use SecDataDir to define data directory first. [Sun Aug 10 13:37:11 2014] [error] [client 1.2.3.4] ModSecurity: collection_retrieve_ex: Unable to retrieve collection (name "ip", key "1.2.3.4"). Use SecDataDir to define data directory first. |
The next line I have set SecRequestBodyAccess on to tell mod security to inspect the body of the HTTP transaction as most attempts to login are done through POST requests. This should almost always be set to On, if you are unsure, make sure it’s set to On. This directive is required if you want to inspect the data transported request bodies (e.g., POST parameters). Request buffering is also required in order to make reliable blocking possible. If you have issues with high server loads due to this being set to On you may want to look at adding a few other configuration options that can help handle this ( see the Mod Security GitHub Wiki here ).
|
1 |
<Locationmatch "/wp-login.php"> |
The next part we use Apache’s LocationMatch to determine if it is in fact /wp-login.php that the person is accessing. Because the /wp-login.php is parsed as RegEx it WILL match sub-directories, and other nested directories as either way the /wp-login.php will always be in the URL.
|
1 |
SecRule user:bf_block "@gt 0" "deny,status:401,log,id:5000135,msg:'ip address blocked for 5 minutes, more than 10 login attempts in 3 minutes.'" |
The code above will check if the block flag was set, and if so, it will deny with status 401 and log to mod security log with the message you see above.
|
1 |
SecRule RESPONSE_STATUS "^302" "phase:5,t:none,nolog,pass,setvar:ip.bf_counter=0,id:5000136" |
This section of the code will check if the response status is 302, which would be the status response for a successful login, this will then set the bf_counter to 0 as the user logged in, and chances are this was not a brute force attempt.
|
1 |
SecRule RESPONSE_STATUS "^200" "phase:5,chain,t:none,nolog,pass,setvar:ip.bf_counter=+1,deprecatevar:ip.bf_counter=1/180,id:5000137" |
This will check if response status is 200 which means there was a failed login attempt. When this is detected it will increase the bf_counter to keep track of how many failed login attempts there were.
|
1 |
SecRule ip:bf_counter "@gt 10" "t:none,setvar:user.bf_block=1,expirevar:user.bf_block=300,setvar:ip.bf_counter=0" |
This checks the count of the bf_counter for the user’s IP, if it’s greater than 10 (means 10+ failed login attempts), then we need to block this user’s IP.
|
1 |
ErrorDocument 401 default |
Setting ErrorDocument 401 default at the bottom of the file will direct Apache to direct any 401 errors away from the WordPress installation. This should help alleviate extra load on the server by having Apache serve 401’s with default handling, whereas if you did not include this (and did not have it in your .htaccess file), WordPress would handle the 401 error.
If you use the code I provided above the configuration is set to block the IP for 5 Minutes ( 300 Seconds ), after 10+ Failed Login Attempts within 3 Minutes ( 180 Seconds ). If you want to change this you can do so by changing the following values:
Change Block Time Length
Find this value
user.bf_block=300 which is in the last SecRule inside the Locationmatch, and change 300 to however many seconds you want to block the IP for. So if you wanted to block for 10 Minutes instead of 5 Minutes, change this value to 600.
Change Amount of Failed Logins
Find this value
"@gt 10" which is in the last SecRule inside the Locationmatch, and change 10 to the amount of failed logins required before blocking the IP. So if you wanted to block after 5 failed login attempts, change 10 to 5.
Change Failed Login Period
Find this value
ip.bf_counter=1/180 which is in the Second to last SecRule inside the Locationmatch, and change 1/180 to how many seconds you want to track the login attempts for. Say you wanted to change it so the 10 failed login attempts could be within a period of 10 minutes, you would change 1/180 to 1/600.
Now you will need to make sure that ConfigServer Firewall has Mod Security enabled. Go to WHM, select ConfigServer Firewall, click Edit Configuration, and find LF_MODSEC, make sure this is set to something other than 0. Save configuration, restart LFD/CSF, Profit!
With the new features included in WHM/cPanel as of 2017, you can now configure and setup Mod Security rules directly through WHM, but it is a little hidden to get to that point, so follow instructions and pictures below to add the custom rules.
Login to WHM Interface
To add or edit custom mod security rules in cPanel/WHM first login to your WHM.
Once you’re logged into the WHM interface, you will want to click on the ModSecurity Tools link, which will show the page with all the hits in a list table.
In the top right corner you will see the Rules List button, click on that button to go to the ModSecurity Rules List page.
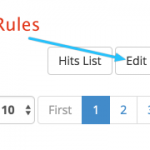
On the ModSecurity Rules List page you will then see another button in the top right corner that says Edit Rules … this is the button you need to click to edit your custom mod security rules file.
Once you click on that button, you can then copy and paste the rules and code from above, click save, and voila!


Pingback: WordPress Security - The Chamberlands()