How to setup a WordPress PHP site with Nginx, PHP5-FPM, and MySQL using Ajenti V with working Permalinks
While beta testing Ajenti-V and attempting to setup a simple WordPress site, I ran into enough problems to warrant creating this tutorial. Mainly because the way Ajenti-V sets up Nginx, there was a good hour of troubleshooting and testing that I had to do before getting a fully functioning site that had working permalinks. Below I will describe exactly what needs to be done to get a full WordPress site up and running with Nginx, MySQL, PHP5, and Ajenti-V.
So to get started, i’m going to assume this is a blank VPS running Ubuntu, but these instructions should work for pretty much any distribution.
Install Ajenti
First you will need to install Ajenti, and there are instruction on Ajenti’s website on how to do so. For this example you will need to follow instructions for Ubuntu:
- Installing Ajenti on Debian
- Installing Ajenti on CentOS/RHEL
- Installing Ajenti on Ubuntu
- Installing Ajenti on FreeBSD
Setup Ajenti
Go ahead and login to Ajenti and set everything up. Make sure to change your password under the Configure section:
default username: root
default password: admin
default url: https://yoursite.com:8000
Install Ajenti-V
Now it’s time to install Ajenti-V. There are instructions on Ajenti’s website How to Install Ajenti-V on Debian (Ubuntu), but there are a few prerequisites missing and will cause problems when trying to use MySQL.
Remove Apache2
Sometimes depending on how Ubuntu was setup (or if a template was used) you may have Apache2 already installed on the server, because Ajenti uses Nginx we do not need Apache. Run this command from SSH terminal:
|
1 |
apt-get remove apache2 |
Install Ajenti-V and Ajenti-V Packages
|
1 |
apt-get install ajenti-v ajenti-v-nginx ajenti-v-mysql ajenti-v-php-fpm |
Install other required packages
|
1 |
apt-get install php5-mysql php5-fpm |
Restart Ajenti
|
1 |
service ajenti restart |
Custom Edit or New Nginx files while using Ajenti
If you plan on using any custom files for Nginx or even editing the configuration files Nginx uses (or Ajenti creates), you cannot edit the existing files. Ajenti will automatically overwrite those files and you will be stuck wondering why the configuration you put in those files keeps disappearing.
So, you have two options if you want to edit the existing Nginx configuration files, or the website specific configuration.
If you want to edit the Nginx configuration file, you can place any new something.conf in this directory:
|
1 |
/etc/nginx.custom.d/ |
If you look at the /etc/nginx/nginx.conf file you will see that all files with a .conf extension will be automatically loaded after all files in the /etc/nginx/conf.d/ directory. This is where you should place any additional configuration files you may want to use with Nginx. Remember, these files will be for actual Nginx configuration.
If you want to specify configuration for a specific domain/website you should include that extra configuration in the Ajenti configuration section where we add this file below (Advanced > Custom Configuration):
|
1 |
include /etc/nginx.wp/restrictions.conf; |
You can also create a new file anywhere you want, and just add another include declaration to that file.
Create custom Nginx WordPress directory and files
Due to the way Ajenti V sets up Nginx, we will need to create our own Nginx WordPress directory to keep all of our extra configuration files inside. Wordpress has instructions on their site on How to Setup WordPress with Nginx, but to save you the time of troubleshooting and playing around with the settings to find out what you need to remove, I created a Github with the modified files.
Login to your server over SSH, create the new directory, and change to that directory:
|
1 |
mkdir /etc/nginx.wp && cd /etc/nginx.wp |
Download the modified restrictions.conf from my Github repo:
|
1 |
wget https://raw.github.com/tripflex/ajenti-v-wp-nginx/master/restrictions.conf |
Download the modified wordpress.conf from my Github repo:
|
1 |
wget https://raw.github.com/tripflex/ajenti-v-wp-nginx/master/wordpress.conf |
Setup PHP WordPress Site with Ajenti V
Create New Website
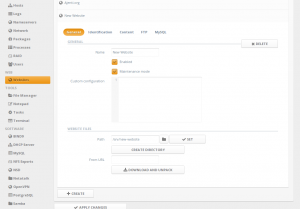
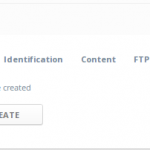
Navigate to Ajenti panel, and open Websites section. Click Create button, and expand newly created New Website entry.
General Settings
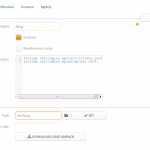
Uncheck Maintenance mode checkbox, set Name to “Blog”, and Path to, for example, “/srv/blog”, and click Create directory to create this directory on server.
Next you will need to add two lines under the Custom configuration section that will include two files we created from above:
|
1 2 |
include /etc/nginx.wp/restrictions.conf; include /etc/nginx.wp/wordpress.conf; |
Identification Settings
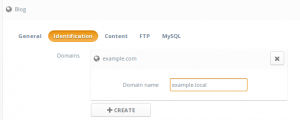
Under Identification page, Create and set a domain entry.
Content Settings (PHP)
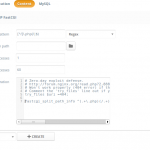
Under Content page, Create a new content entry of type PHP.
Required Min processes – set to 1 if unsure.
Required Max processes – set to something between 10 and 60 if unsure.
Required custom configuration for WordPress, which will help prevent an Nginx exploit, all you need to do is add this code to the Custom configuration section:
|
1 2 3 4 5 6 |
# Zero-day exploit defense. # http://forum.nginx.org/read.php?2,88845,page=3 # Won't work properly (404 error) if the file is not stored on this server, which is entirely possible with php-fpm/php-fcgi. # Comment the 'try_files' line out if you set up php-fpm/php-fcgi on another machine. And then cross your fingers that you won't get hacked. try_files $uri =404; fastcgi_split_path_info ^(.+\.php)(/.+)$; |
MySQL Settings
Under MySQL page, click Create to create a database. Click Apply changes, now navigate to http://domain/ and use the DB name, username and password from MySQL page to set up your WordPress installation. Profit!
Install Nginx Helper Plugin
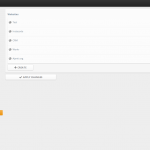
You should now login to your WordPress site and install the “Nginx Helper” plugin to prevent all of your URLs from starting with index.php/:
Helpful Logs and Troubleshooting
A couple debug file locations to help you get everything up and running:
PHP
|
1 |
/var/log/php5-fpm.log |
Nginx
|
1 |
/var/log/nginx |
If you’re having problems getting this to work, through SSH you can check the status and start/stop/restart Nginx, PHP5-FPM, and Ajenti with these simple commands below. Just replace status with start/stop/restart, etc:
|
1 |
service nginx status |
|
1 |
service php5-fpm status |
|
1 |
service ajenti status |
-
SONB
-
Doug Knowles
-
Luke Mackenzie
-
j
-
j
-
Stu Rader
-
Myles McNamara
-
Stu Rader
-
Stu Rader
-
Myles McNamara
-
Myles McNamara
-
-
-
-
-
erwanlescop
-
Myles
-
Myles
-
Myles
-
erwanlescop
-
-
-
Chris Bourke
-
Myles
-
-
Robin
-
Myles McNamara
-
-
Dave Garello
-
Myles
-
Dave Garello
-
erwanlescop
-
Skyline Servers
-
-
Dave Garello
-
-
biz worx
-
Stu Rader
-
Myles
-
Stu Rader
-
Stu Rader
-
Myles
-
-
-
-
Stu R
-
Myles
-
Stu Rader
-
Myles
-
Stu Rader
-
Myles McNamara
-
Stu Rader
-
Myles
-
Stu Rader
-
-
-
-


