

Modifying your hosts file to point a domain at a specific IP address
Sometimes you will have a need to point a domain at a different IP than the current DNS resolves to. This can be to test your website when moving it from one server to another or if you are a web developer and need to test the site before making it live. Whatever the reason it is very easy to do this on both Windows, Linux, and Mac systems.
Windows
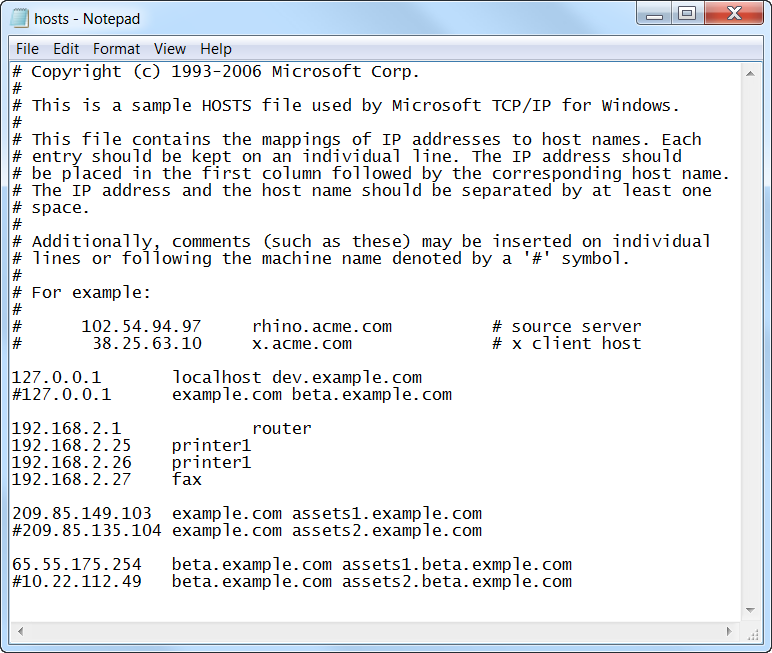
 The file you will need to edit on a Windows machine is located at C:\Windows\System32\drivers\etc\hosts this is assuming C: is the drive your Windows installation is on. Open this file in a text editor such as Notepad or one of my favorites Notepad++. You will see a text file similar to the image on the right.
Now you will probably not see the lines starting with the 192 IP address as these were added for examples.
As you can see in the example to the right, we are telling our computer to use IP 209.85.149.103 for example.com and assets1.example.com. If you look at the line below that it has a # (pound) symbol. This is used to comment out that line, basically disabling that entry.
Linux
 Linux is setup exactly the same it is just a different file that you need to modify. The linux file that you will need to edit is /etc/hosts . You can edit this with a GUI such as an editor in Ubuntu or through nano, vi, or vim under a linux command prompt. An example of a linux hosts file is on the left. As you can see we are now specifying that anytime we type mydomain.com or www.mydomain.com in a web browser it will automatically use 67.23.243.138 as the server it contacts for that website.
Mac
The file you will need to edit on a Mac should be something similar to /private/etc/hosts
Explanation
First you will need to determine the IP of what you want to point the domain at, you can do this by contacting your host or they should have provided you with the IP in your account information email. You will need the server’s IP address. If they give you a hostname such as "server408.hostt.net" you can just open a command prompt and ping that hostname to get the IP.
Next you will just need to enter it on a new line inside your host file, IP goes first on the left, then a space or tab after the IP you can put the domains. You will need to do this for ANY sub domains INCLUDING www…because even though it has become standard to use www, it is in fact a subdomain.
So if I setup a new account and the server IP was 67.23.243.138 and my domain is hostt.net, BUT that domain is already pointing at another server, I can still set it up as if that other server does not even exist.
The line I would add to my hosts file would be this:
67.23.243.138 hostt.net www.hostt.net
And that’s it! If you want to disable it just put the # sign in front of it and save the file! Now wasn’t that easy!
In my next blog post I will show you some automatic tools you can use for this as well as blocking ADs on websites!